Tuning and Stringing the Dilruba or Esraj
| STRINGING AND TUNING THE DILRUBA AND ESRAJ Section 1 – Introduction Section 2 – Basic Concepts of Tuning Section 3 – Overview of Strings Section 4 – Dilruba/Esraj Strings Section 5 – Tools Section 6 – Stringing the Base Section 7 – Stringing the Tuning Pegs Section 8 – Tightening the Strings |
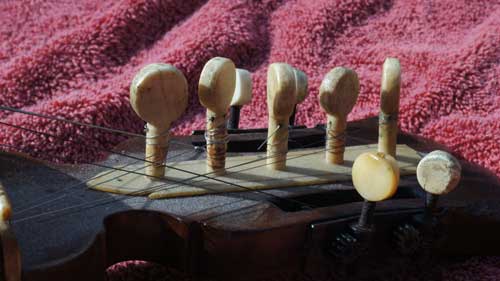
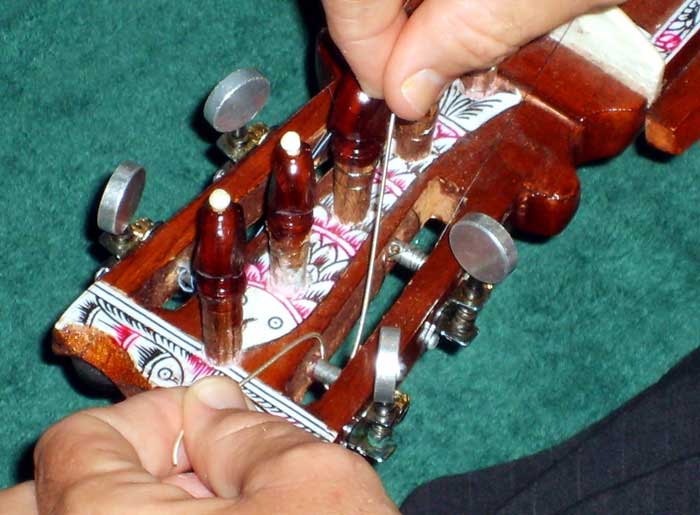
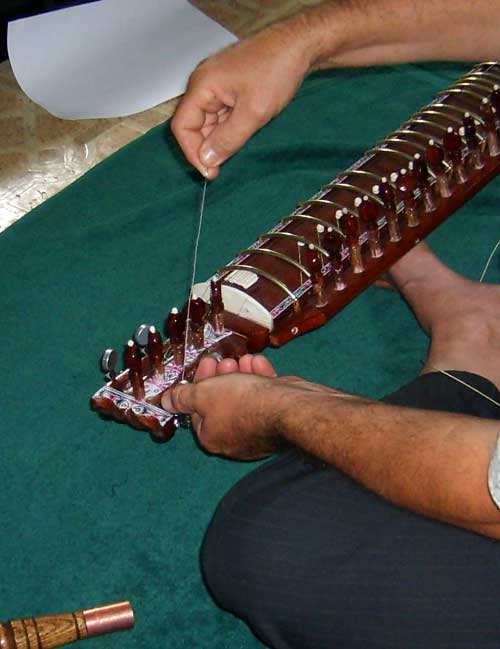
As already mentioned, the instrument requires us to have the string fixed at both ends. We have already shown how the string attaches to the base. In this page we will show how the string attaches to the tuning pegs.
| Are you interested in a secular approach to teaching Indian music. |
|---|
Indian music is traditional taught in a fashion that is linked to Hindu world views. But there are situations, often in schools, where this approach may not be the best. In such situations The Music of South Asia may be the best resource for you. |
Traditional Approach
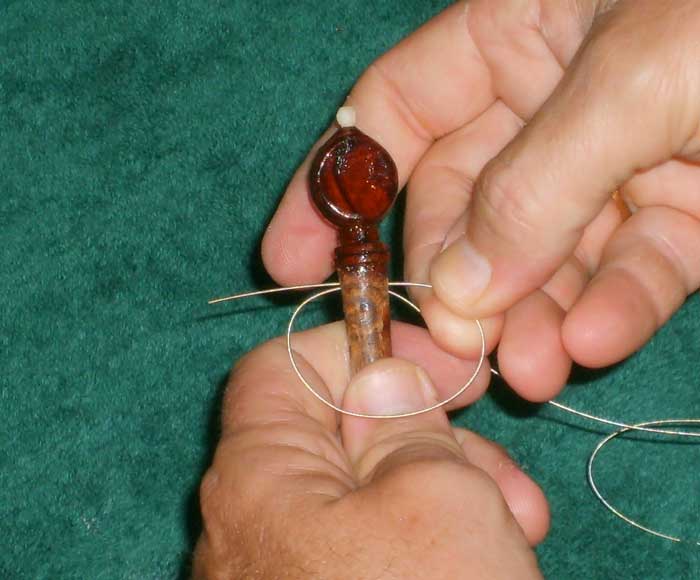
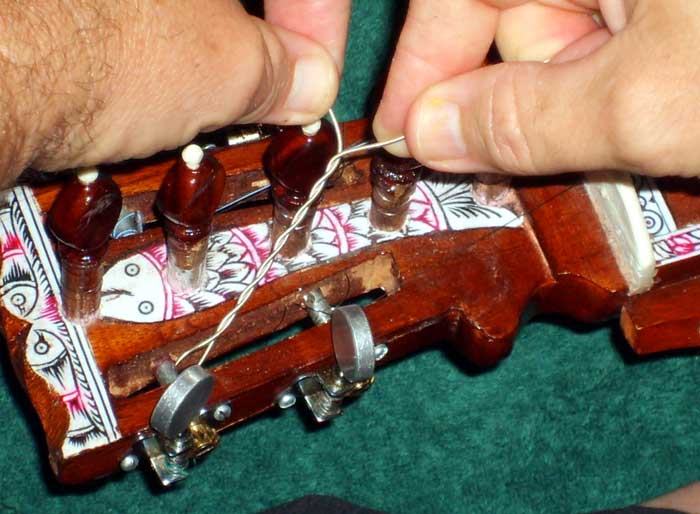
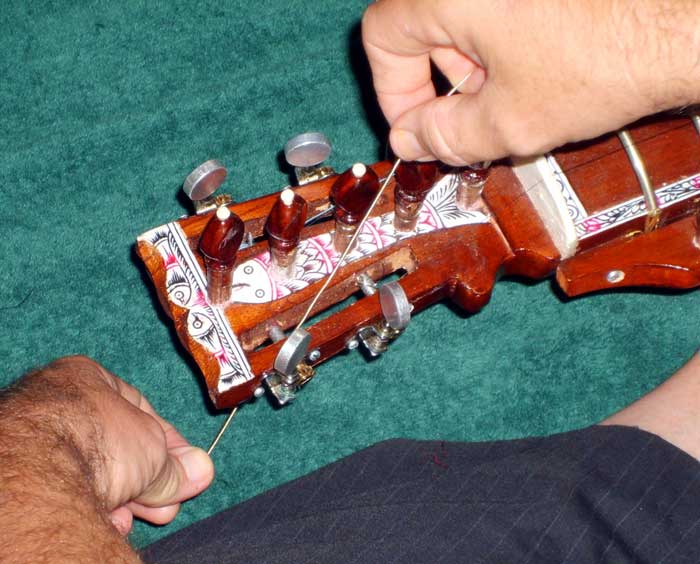
There is a traditional way of attaching the string to the friction peg.
Step 1 – Determine how much excess string you are going to need. Estimate the length that you will need to extend all the way to the friction peg; and then mentally add about 6 inches. Cut off any excess.
Step 2 – Insert the string to into the hole in the peg.
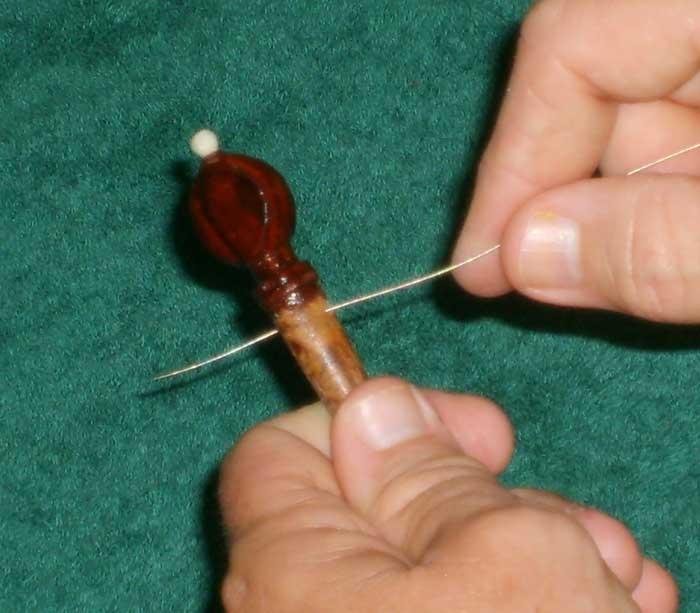
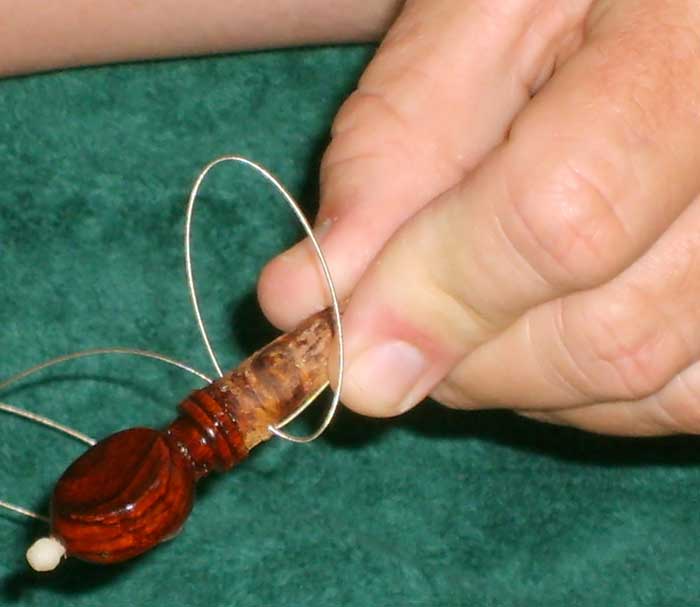
Step 3 – Bend the string back around to go into the hole once more.
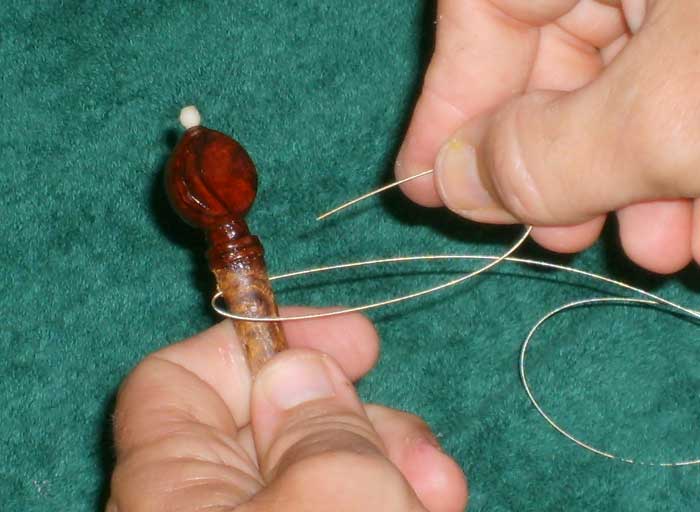
Step 4 – Reinsert into the same hole, and from the same direction as previously done.
Make a sharp bend in the string about 3/4ths of an inch from the end.
Pull the remaining string tight.
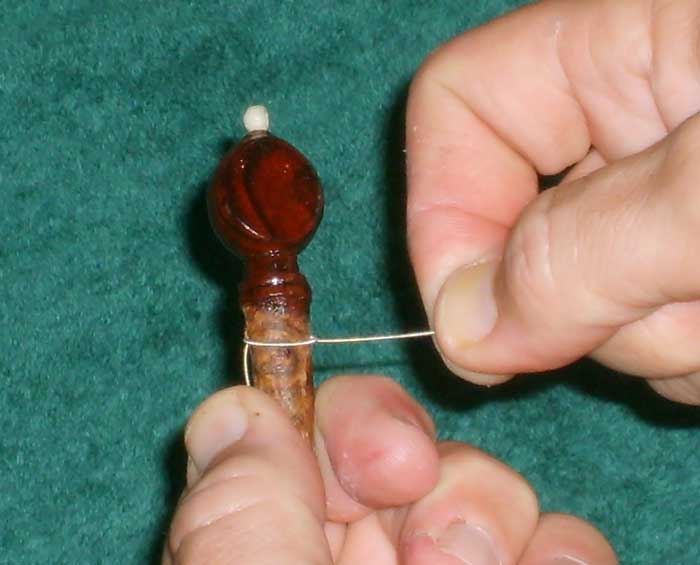
There is one thing that we must keep in mind whenever we deal with friction pegs. THE TUNING PEGS ARE NOT INTERCHANGEABLE! Always remember which hole each individual tuning peg came from and make sure that it goes back into the same hole.
Attaching the String to the Mechanical Tuner (Permanent)
Attaching the String to the Mechanical Tuner (permanent) – There is a way that is usually used to attach the string to the mechanical tuner when you want the string permanently fixed.
Step 1 – Insert the string through the hole in the mechanical tuner.
Step 2 – Twist the string around itself a few times.
Step 3 – Then tighten
This approach has advantages and disadvantages. The biggest advantage is that it is an east way to make a good firm connection to the mechanical tuner. It also does not leave sharp ends of strings poking out in random directions. Such ends can cause you to lose a fair amount of blood through assorted pricks. The main disadvantage is that it is very difficult to remove the a string without damaging it. Therefore, it is unsuitable in situations where you anticipate changing the strings in order to change the key.
Attaching the String to the Mechanical Tuner (Temporary)
If you anticipate changing the strings periodically, there is a way to attach the string so that it may be removed without damaging it. To begin with, make sure that you are using a string which has an eyelet mounted on the base to facilitate easy attachment and removal on the lower side side. To facilitate the removal on the upper side, you must not wind the string around itself before tightening. Simply inset the string; then tune as usual. This approach has the advantage that the string may be put on and taken off an indefinite number of times without damaging it. This allows you to have a number of strings at your disposal, each one appropriate for the different keys in which you may be required to play.
| STRINGING AND TUNING THE DILRUBA AND ESRAJ Section 1 – Introduction Section 2 – Basic Concepts of Tuning Section 3 – Overview of Strings Section 4 – Dilruba/Esraj Strings Section 5 – Tools Section 6 – Stringing the Base Section 7 – Stringing the Tuning Pegs Section 8 – Tightening the Strings |