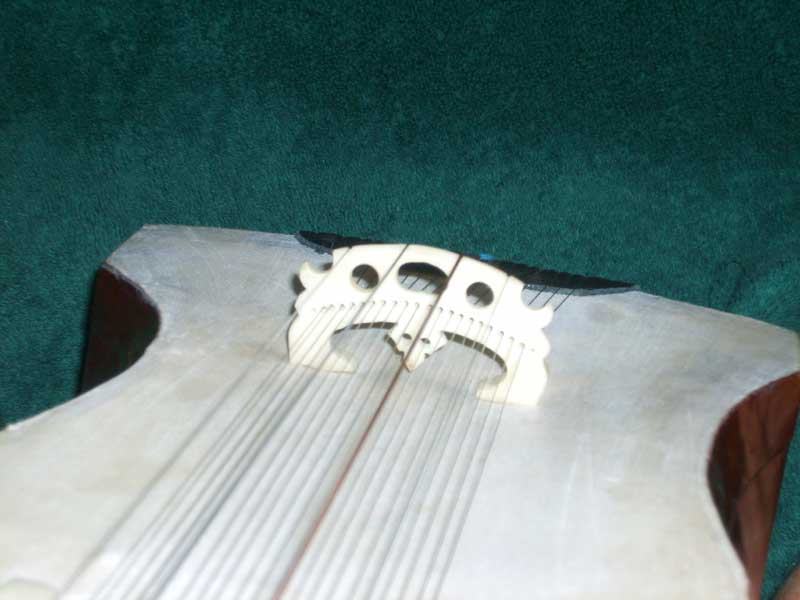
There are a lot of dilrubas being sold today. It is very encouraging that there is a resurgence in interest in this beautiful Indian instrument, but it is unfortunate that many of these instruments are being rushed to sale without attention to the final details. One important part in determining the quality of the dilruba is the bridge. Many of the bridges on today’s dilrubas have problems. The illustration below is a typical example:
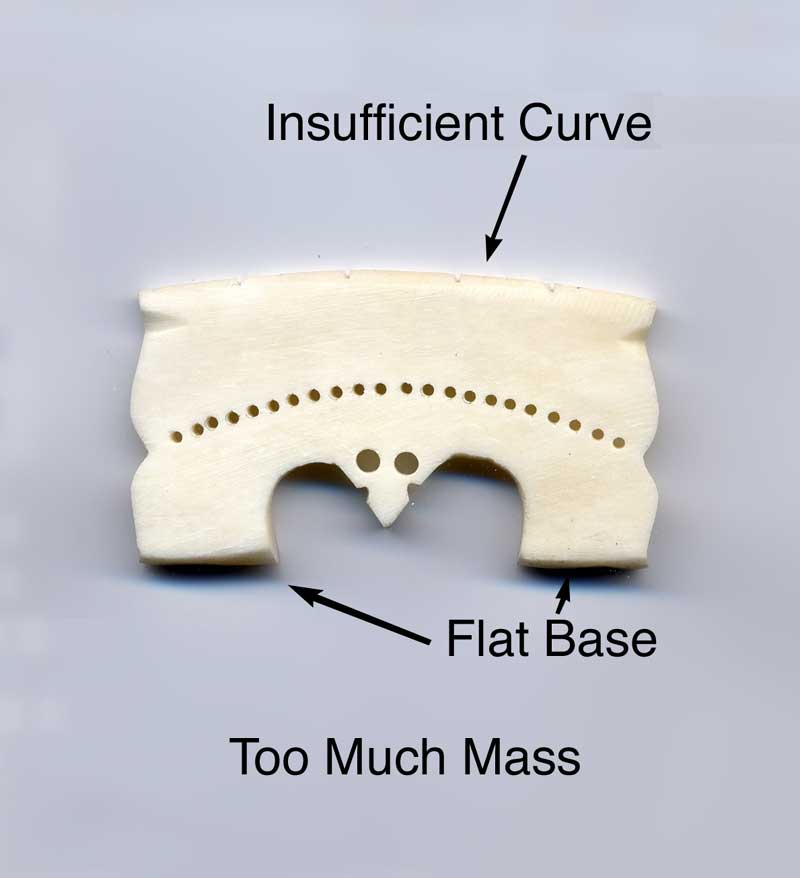
There are two main problems and one smaller problem with this bridge. Notice that the curve where the strings rest is insufficient. This makes playing of the 2nd and 3rd string extremely difficult. Another problem of this bridge is that it produces a dull, choked sound due to excessive mass. If your dilruba has a bridge that looks like this, you will be very familiar with the problems that I describe. There is another problem which does not seem to be so important. The bridge has a flat base, while there will always be a gentle curve when it rests upon the skin. This tends to produce pressure points at both extremes of the bridge.
Previously there were only two options. You could either just live with the bridge or you could purchase a new bridge and replace the old one. Both options have problems. You obviously do not want to continue using a bridge with problems such as this, so just living with it is not a good option. Furthermore purchasing a new bridge does not always solve the problem. If one is dealing with the internet, there is no guarantee that the new bridge will be any better.
This web-page introduces a third possibility. You can work on your own bridge; fix the problems, and put it back. This is what we will discuss here.
Now I know some of you will look over this and think “Wow that looks hard, what If I screw it up”. This is an understandable reaction, but what if you ruin your bridge? You will just buy a new one. Wasn’t that what you were going to do anyway? So I really do not think that you have anything to loose by trying this first.
Tools Required
- 1 small file with a triangular or sharp cross section
- 1 high speed drill with various bits
- sandpaper
Find the Correct Contour
One of the problems with this bridge is that it has an insufficient contour where the strings rest. If the contour is insufficient, you will have a very difficult time playing the 2nd string (shadaj tar), and the 3rd string (pancham tar), independently. When you try, you will always get two strings bowed together.
The obvious first step is to try and figure out exactly what the correct contour is supposed to be. It turns out that this is really easy.
First make sure that your instrument is all correctly strung and tuned. It should be kept this way for at least a week or two so that the skin has settled into position.
Loosen the tension on the string that you want to work on. You will be working only on the 1st (baj tar), 3rd (pancham tar) and the 4th (drone) strings. You will not work with the 2nd string because this should be kept at the highest level. (Actually, if the action is too high, you may wish to work on it too. But usually you do not want to touch this one.)
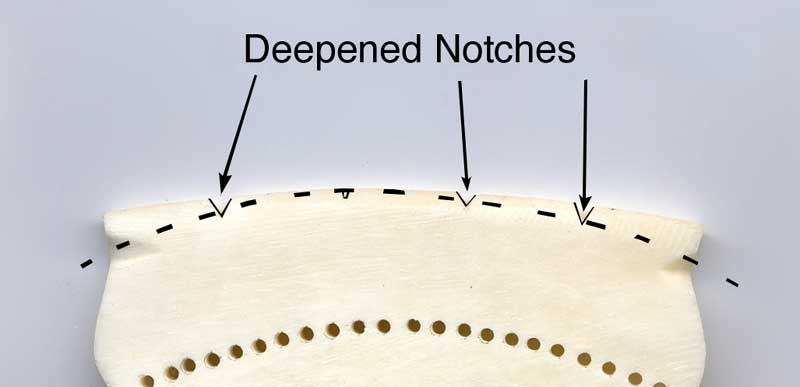
Take a very small file and carefully start deepening the groove. Do this very slowly because you can cut the groove, but you will not be able to fill it in should you remove too much. In this process, it is not necessary to completely remove the string. Simply loosen the tension enough to move the string out of the way.
It is very important to check the height very frequently. You do this by replacing the string, tighten it up, bow it, and see how it is behaving. As you work with the baj tar (1st string), you may find it necessary to readjust some of your frets. This is OK, it is part of the process. After a while, you will have the strings at a height that seems comfortable. The example for my dilruba is shown in the picture below. Yours may be a little different, but the process is the same. (I have outlined the notches to make it easier to see the depth.)
Now it is necessary to remove the strings and remove the bridge.
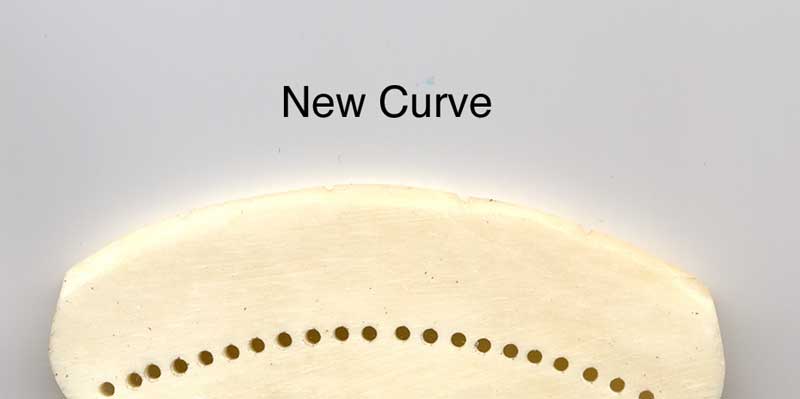
Take the high speed drill and with a grinding attachment, follow the new curve implied by the notches. The bridge should then look something like the illustration below:
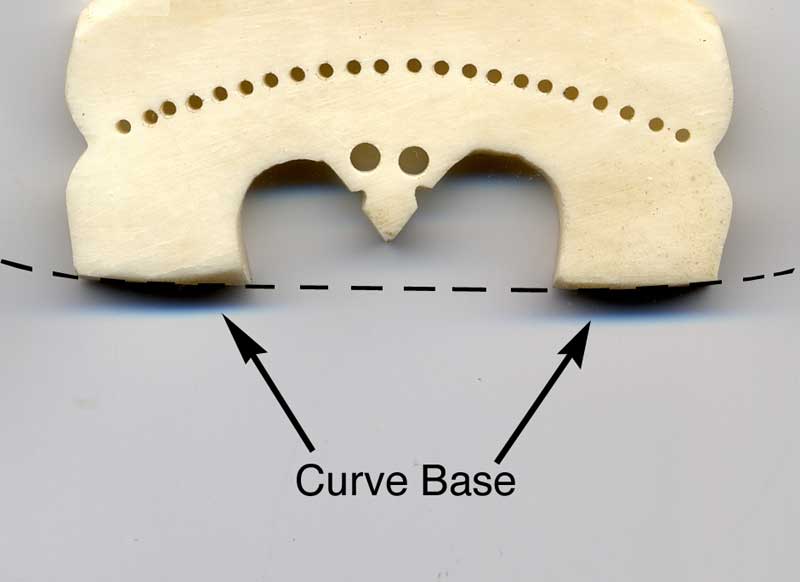
Curved Base
There should be a very slight curve to the feet of the dilruba. This is a nice little addition but is not critical to the dilruba.
It is important to visualise how the bridge rests upon the skin. Remember that there is a straight line which connects the two inner points of the base. Thereafter, there is a slight curve which runs in a tangent from this baseline. This is shown in figure below:
Reduction In Mass
A major problem with many of the bridges that one finds today is that the mass is simply too great. This chokes the sound and keeps it from having the bright sound which is so desirable.
At first, it might not be intuitive as to why changing the mass would effect the sound. I started thinking about it while I was pondering violin mutes. A mute is a small attachment made of a variety of substances, which attaches to the bridge of the violin. The action of these seems to derive from the increase in mass. I began to think that if increasing the mass of the violin bridge would cause the sound to be choked, it stood to reason that I could open up the sound of the dilruba by reducing the mass. I became more convinced by comparing two dilrubas that I already had; one of which had a bright sound and the other a dull sound. I could see that the bridge with the dull sound had a much more massive quality than the one with the bright sound. Therefore, I decided to go for it.
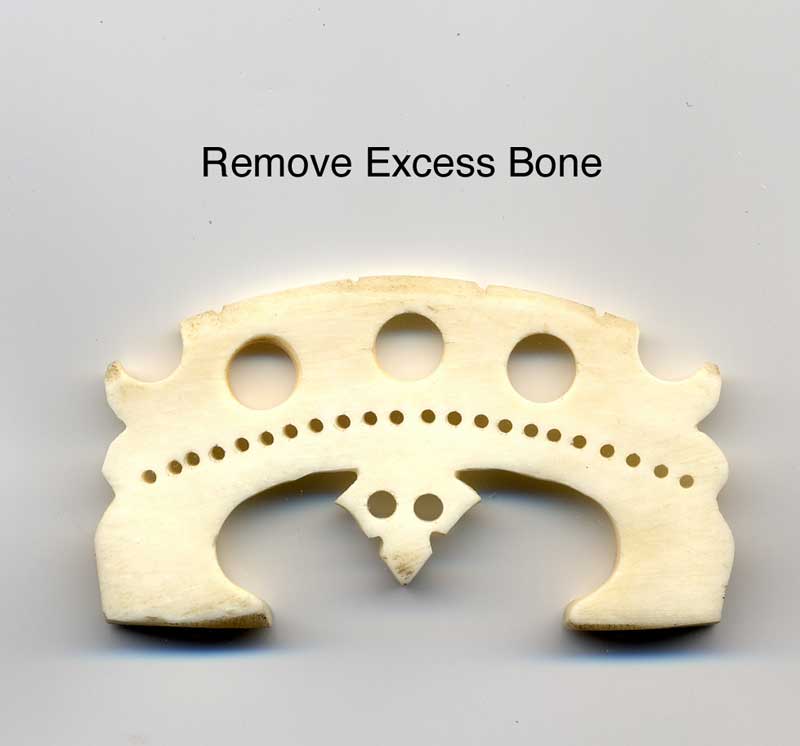
Reducing the mass is surprisingly simple. You just start cutting away as much of the bridge as you can, and the mass will be reduced. I chose to cut holes in the bridge and reduce the unnecessary bone around the base. However, I felt that it was important not to reduce the size of the base. (Others may have a different opinion). This produced a bridge as shown below:
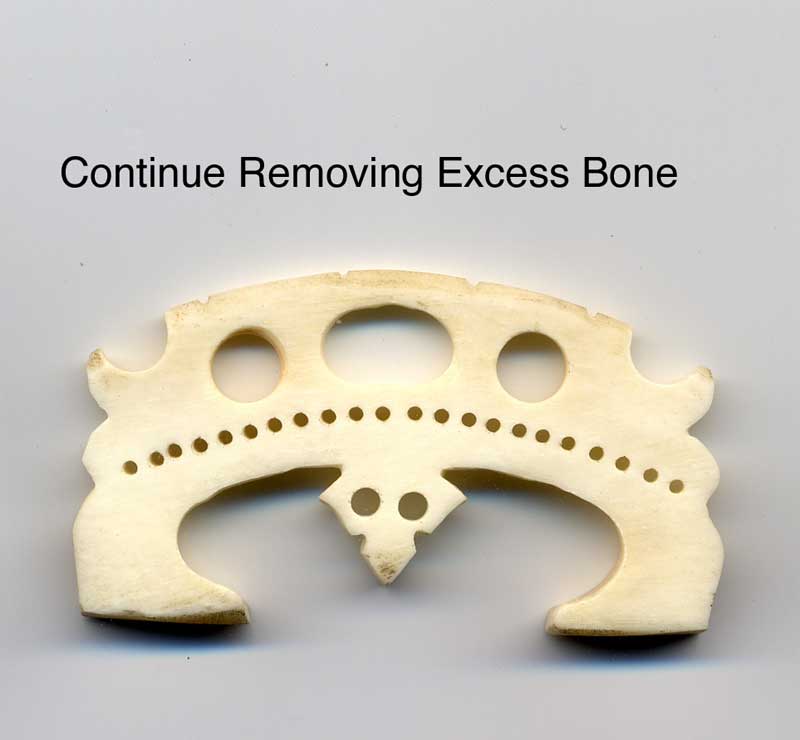
Intuition told me that I should reduce the mass even more. So, I enlarged the centre hole and continued to reduce the excess bone around the base.
There were other places where I reduced the mass that does not show up in the pictures. I made the bridge a little bit thinner. However this is something that should be done with care. Making the bridge thinner does not reduce the mass that much, but it does compromise the strength, so be careful.
When you are satisfied with your work, it is a good idea to go over it with sandpaper. This will remove any scratches, burnt bone, or other blemishes.
Finally I wound up with a bridge as shown below:
Now I know that many of you will ask why I did not remove the two horns on the side of the top, or remove the triangular protrusion below. I admit that it would have further reduced the mass. However, I left them purely for aesthetic reasons.
The Final Result
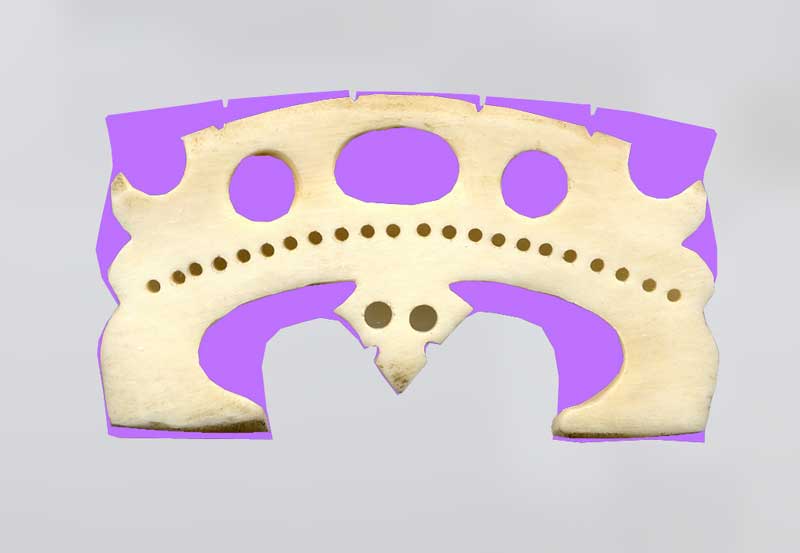
Let us look back and get an idea as to how much the bridge was altered. This is shown in the illustration below:
The purple silhouette represents the original bridge, while the inlayed picture is the final result. We see that there is a significant reduction in mass. There is also a more pronounced contour for playing the strings, and the base should fit nicely to the skin. However, just as the proof of the cook is in the cooking; the final results can only be told once the bridge is put on and the sound checked.
I put everything back together, and I can tell you it is like a new instrument. It is now easy to play the second and third strings independently, and the sound of the instrument is no longer choked and muted; it is bright and beautiful.
Well that is my experience. It worked wonders for my dilruba; I hope it does the same for you. Good luck!
| This book is available around the world |
|---|
Check your local Amazon. More Info.
|